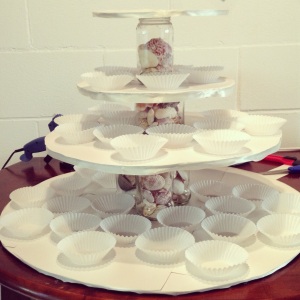
I was disappointed with what I saw while shopping around for a cup cake tower. They were too small, too expensive, flimsy looking, and all-around unimpressive. So what does that mean? I made my own crappy, flimsy, and unimpressive cupcake tower. And now I will share with the internet comprehensive and specific directions how to make your own if ever you need to.
What you need:
- adult supervision
- 5 glass jars (emptied, and cleaned of labels)
- seashells, marbles, rocks, sand, or whatever decorative material you choose to put in the jars
- a lot of cardboard
- ribbon, or lace
- glue gun
- a multi-tool for cutting cardboard
- string & a push pin
- ruler
- material to cover the cardboard like card stock, paint, or fabric
Enlist a responsible adult.
Ensure your safety by enlisting the watchful gaze of an adult you trust. Box cutters, glass, push pins, and glue guns (reaching 400 degrees!) are hazardous materials.
Cutting cardboard into smaller cardboard
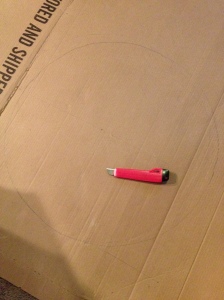
Grab the giant piece of cardboard and draw your bottom most tier. My tiers are somewhat circular; the bottom most is 24″ in diameter. If you’re wondering how I drew such a huge (and naturally perfect) circle I’ll tell you my trick:
- Choose a spot on the cardboard and stick a push pin in it and then tie some string around it. Note: don’t use string that is elastic-y like yarn it will not serve you well.
- Cut a piece of fishing wire or other string to the length of the radius of your circle.
- Using your writing hand grab the string at the end and use it to guide you as you draw a circle. Keep the string taut as you trace around.
- or just wing it..
Once you trace your circle you can use the multi-tool to cut it out. I recommend cutting towards yourself.
Repeat this process for as many circles or tiers as you want. I did four tiers with diameters of 24″, 18″, 12″, 10″. I recommend putting the smallest on the bottom.
Note: Fortify your tiers and double up on the cardboard. Or not I don’t care.
Envision a perfect finished project.
(Its a natural part of DIYing to envision a product you can’t create. Disappointment is key here).
Shitty to Pretty.
Heat up that glue gun. If you’re like me you often wonder, is it hot yet? Squeeze the trigger and see if your skin starts boiling when hot glue drips on it. Not boiling? Not ready.
Just glue stuff over the cardboard. Like card stock on top of the circle and, say, ribbon around the edges.
Shoot you’re out of supplies!! Craft store closes in 20 minutes:
Choose your own ending!
You can always have it your way when you DIY. Who am I to assume what you will do? So choose how your story will finish.
1. Hasty trip to craft store.
2. Take a break and never finish.
1. Take a hasty, unplanned trip to the craft store.
My favorite part of DIYing is not buying enough of some damn supply and having to return to the craft store in a rage and then buy way more than is needed to finish the project.
2. Take a break and never finish.
My favorite part of DIYing is not buying enough of some damn supply and telling yourself you will get the supplies at some vague point in the future.
Stash that thing in the closet and go watch some Buffy! You’re done and will willfully forget you ever started this horrible project! Congratulations!
Assembly!
******REMEMBER: While my safety tips are impeccable, only your adult supervision can ensure your safety.*******


